Get Ready With Me for School!

2:16:00 PM 4 Comments A+ a-

A few days ago I uploaded my "Get Ready With Me" video on Youtube! I woke up early and decided to film my morning routine when I get ready for class!


What I used:
Products Used ----- ☆
1. Hado Labo Lotion
2. Canmake Cover and Stretch Concealer
3. Ettusais BB Cream Compact
4. MAC Paint Pot in Soft Ocre
5. Rimmel Sweet Chocolate Eyes Eyeshadow
6. Dolly Wink Liquid Eyeliner (Brown)
7. Shu Uemura Eyelash Curler
8. Fairy Drops Mascara
9. KATE Eyebrow Pencil
10. Majolica Majorca Puff de Cheek Blush
13. Majolica Majorca Lipgloss

Hope you guys enjoyed the video!!

KATE Gradical Eyes Eyeshadow Review 「ケイト グラディカルアイズ」

9:41:00 PM 0 Comments A+ a-

Hey guys!

Today I have an eyeshadow review! Exams are actually coming up in a few weeks time but I actually took a few photos for some product reviews so will try to get them up soon!

Today I'm going to review the KATE Gradical Eyes Eyeshadow Palette in BR-2. I already reviewed this a long time ago but I'm going to try something different with all my reviews now so thought I'd do it again!

I've actually had this palette for about 2 years, I have used it a lot, it's one of my favourite eyeshadow palettes! With this palette you can do quick and easy smokey eyes~


Very simple packaging~


Tells you what each eyeshadow is used for.

Swatches


How I like to use it~

I'm going to be using these numbers as a reference

First take #1 and apply it all over your eyelid. This is an eyeshadow base


Next take #2 and then apply this on the inner half of your upper eyelid, also the inner half of your lower lashline


Take #3 and then apply this on the outer half of your upper lashline


Take #4 and then use this to intensify the colour of the bronze you put on previously, focusing on the area more closer to your lashline


Finally take #5 and then focus this on the outer corners of your eyes to create a smokey effect


Now add some eyeliner and mascara~

Finished!

Super easy and quick smokey eye look!


You can get this look in just under 3 minutes with this palette!


Overall I really like this palette, definitely one of my favourite looks! The colours are really nice and really pigmented. I have to say that the eye primer isn't great, so I would recommend using a better primer to get the best combination. This item was around 900yen which is around $10 in Japan.

Returning back to Shizuoka 2 years later

10:39:00 PM 2 Comments A+ a-

Hey everyone!

Recently I uploaded a new video on Youtube, a short vlog on the day I went back to Shizuoka to see my host family again! I already saw them last year but I didn't vlog it, so this year I decided to do a little bit of vlogging~


I didn't take many photos while I was in Japan compared to the other times. Mainly because I've been to Japan so many times that I found that everything has become.. normal to me? The first few times I took photos of everything since everything was so different and new, but I guess you do get used to things, they don't seem as "special" anymore.. if you know what I mean haha. However I still have posts to do about my Japan trip last year!

Anyway, I took the Shinkansen to Shizuoka for a day. I didn't have much time to spend much time in Shizuoka since I had a lot of meetings in Tokyo.


It was snowing a lot on the shinkansen!

Walking around Shizuoka~


After taking purikura at Shibuya109 Dreams (also known as Shizuoka109), we decided to go have crepes!


I had strawberry Cheesecake~


We did a bit of shopping after but I didn't vlog it unfortunately :( We took purikura again, but this time we went to a place that let us do cosplay purikura! In Japan there are a few places that let you rent out costumes for free just for purikura!


Last year we went as K-on so this year we just decided on kigurumi! The problem with these cosplay rentals is that they are really popular, especially amongst highschoolers so it is always really busy. It may take a while to get a costume T_T

Also in Japan you're able to send purikura to your phone for free so you can download high quality versions! Usually you get about 2 photos for free each time~


Pretty much you can download them if you have friends in Japan. If you're not from Japan you can still download them! If you're a foreigner you can get one of the Softbank prepaid phones (crappiest phone ever, but it's the best you're going to get). You get an email address with the phone so you put that in when you take purikura. You will receive an email with a link where you can download your purikura photo! Now what you'll need also is a smart phone that is able to access the internet (because the Japanese phone won't be able to). I had my iphone with me, so I would forward the email I received on my Japanese phone to my usual email I use on my iphone. Then from the iphone, open up the link and then you can download the photos! Also a note, forwarding the email to your personal email and opening it on your computer won't work.. I tried. It has to be open on a smart phone.

Unfortunately I don't have any more photos, but I took some with Chiho just before I left!


I will try go through the other footage I have filmed in Japan and will try post more vlogs soon!

Sakura Spring Makeup & Waterfall Braid with Katsun

11:41:00 PM 2 Comments A+ a-

About a week ago I uploaded a video in collaboration with my friend Kaotsun! For those of you who don't know, Kaotsun is a K-pop cover dancer on Youtube and is the best one I've seen out there! I met her at a Perth Youtube meet-up we had about 2 years ago, she is one of the sweetest and down to earth person I know ♥

We wanted to do a collaboration for a while but we were both really busy with our own things so it was hard to find a day where we were both free. We finally did about a month ago so we decided to film a makeup and hair tutorial!


I hope you guys like it! It was actually raining that day :( But we were lucky to find an under cover area to film!

And here are some of her dance covers!


We both want to film more videos together so if you guys have any requests please let me know and we will try our best!

Jill Stuart Blush Compact Review 「ジルスチュアート ミックスブラッシュ コンパクト」 

1:36:00 AM 12 Comments A+ a-

I've always wanted to do frequent makeup reviews but haven't done many... mainly because I'm lazy. Believe it or not, it actually takes me quite a few hours to finish a blog post. I have to take photos, edit them, upload, then actually write the post. However I decided that I should just stop being lazy and just do what I've always wanted to do. I've been on a role with blogging lately (lol) and I'm going to make a goal of updating once every few days! Hopefully you guys won't get too sick of me haha.

Today I'm going to be doing a quick review on the Jill Stuart Blush Compact. Jill Stuart is one of my favourite makeup brands, the packaging for everything is extremely gorgeous! I got this blush from my friend Joanna as a birthday present a while ago!

The lighting is a bit inconsistent with the photos.. I was taking these in natural lighting and was doing it while the sun was setting =__= I'll try next time to keep it more consistent!

Onto the review~

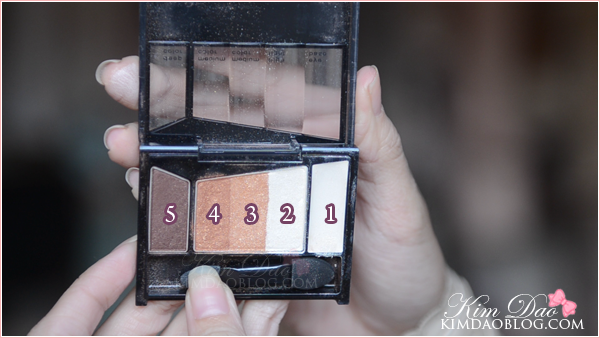
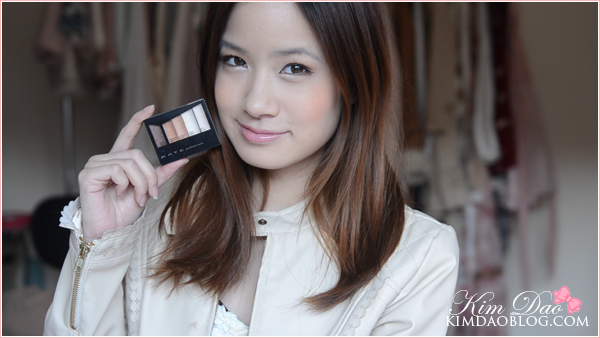
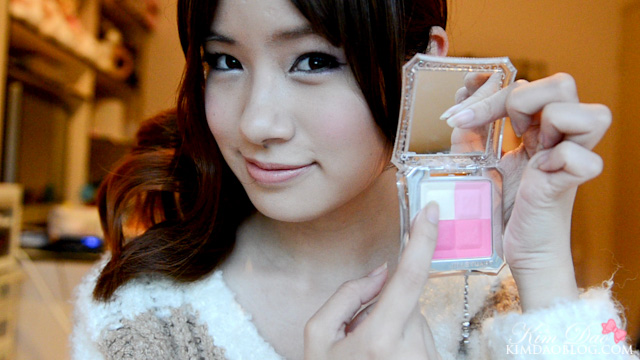
Today I'm going to be reviewing the Jill Stuart Mix Blush Compact Colour in 07 Lovely Tulip


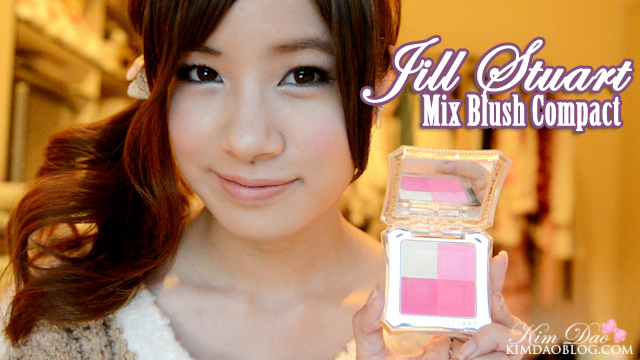
I've wanted to try this blush out for so long, but I never did because it is really expensive T_T This blush is around $45 for it, but I definitely think it is worth it.

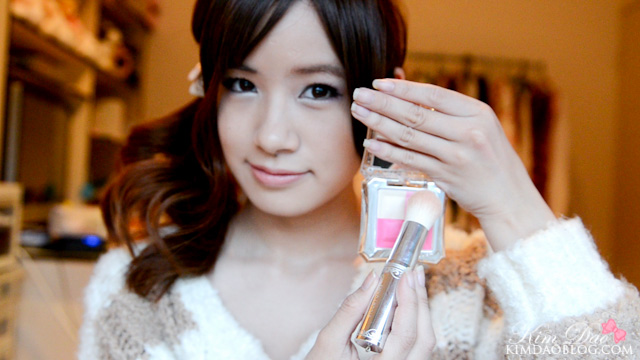
I really love blush, it really completes your makeup and just gives you a nice glowy finish

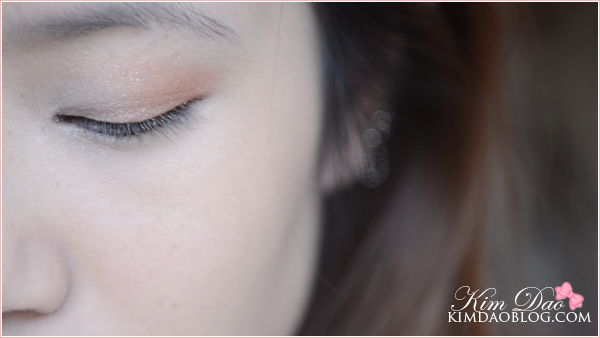
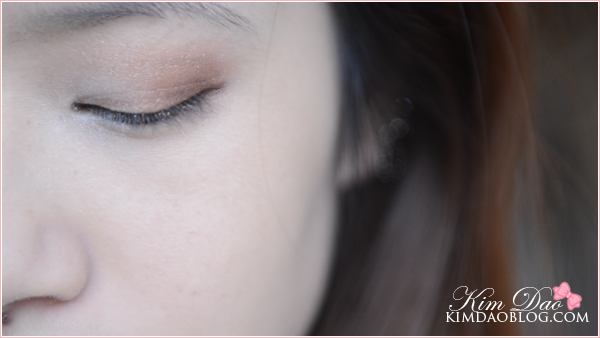
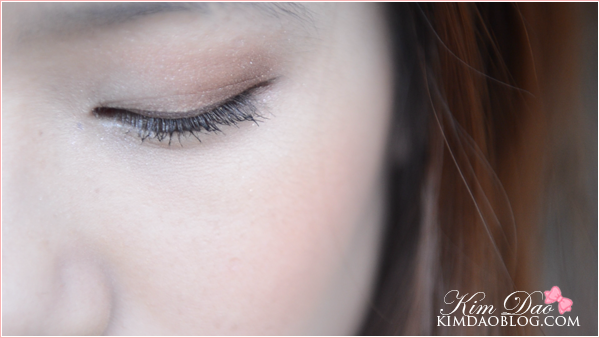
Makeup all done without blush~

And this is the blush I will be reviewing~


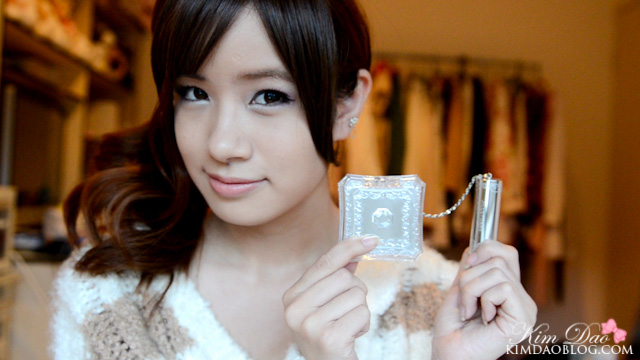
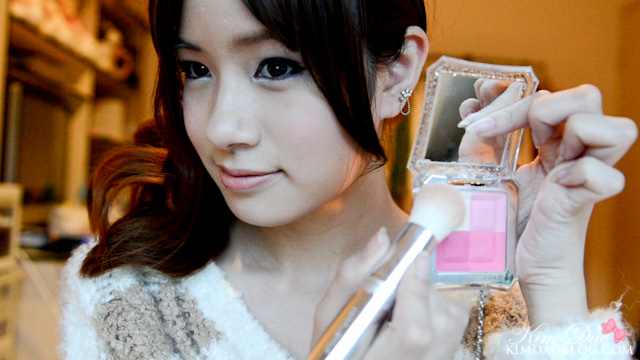
As you can see, the packaging is gorgeous and it also comes with a blush brush attached to it!

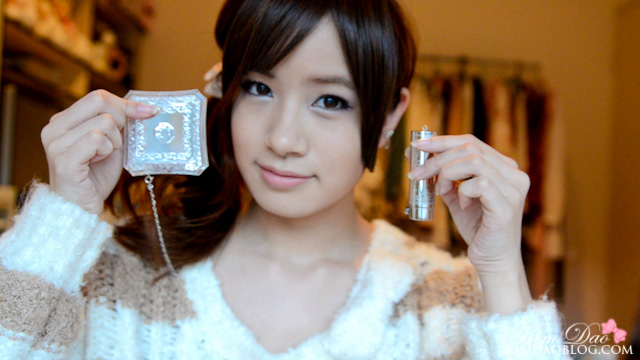
Of course, the brush is detachable


Closeups of the brush~


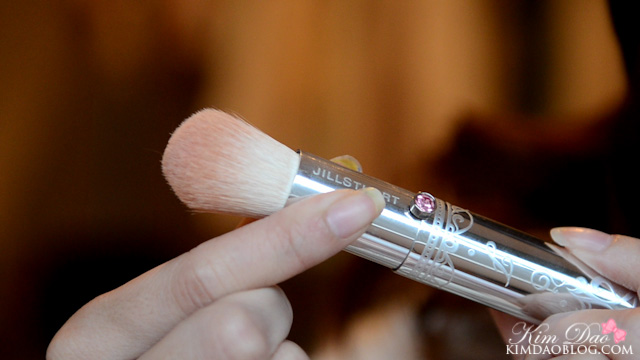
The brush is really soft and the packaging is really convenient. You just open it up, and use the lid of the brush to keep the blush up

Closeups of the blush


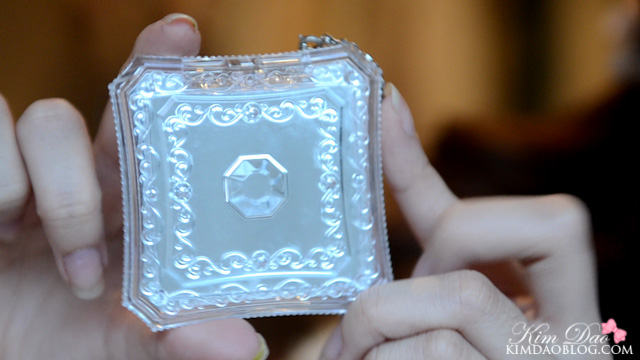
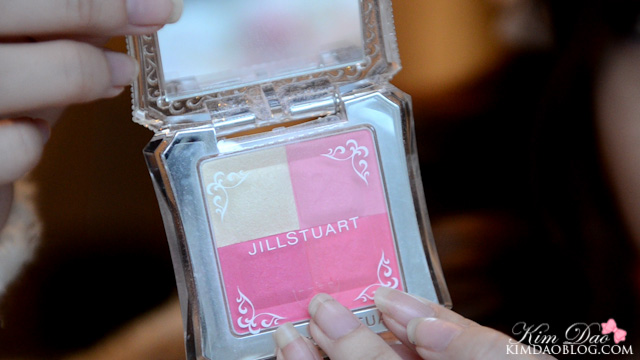
As you can see, really lovely packaging!

Swatches of the different blush colours~

As you can see, they are quite shimmery. I like using the 3 pink colours as blush and the white as a highlighter. I don't recommend mixing the pinks with the white as blush as it would look too shimmery. Also these blushes are really pigmented. They also have a slight floral scent to them aswell!

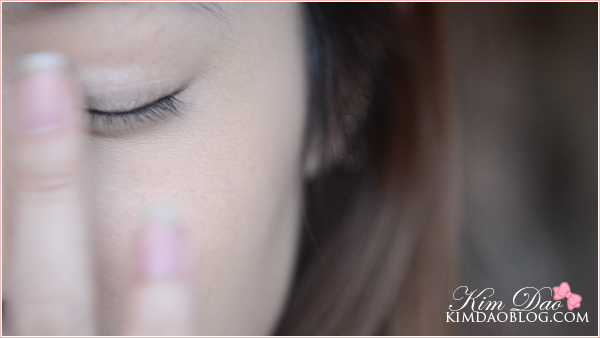
How I apply the blush~
I like to mix all the 3 pink colours together. I start from the top and make my way to the bottom left colour


Then just applying it on my cheeks, I like to bring the blush up along my cheekbones.


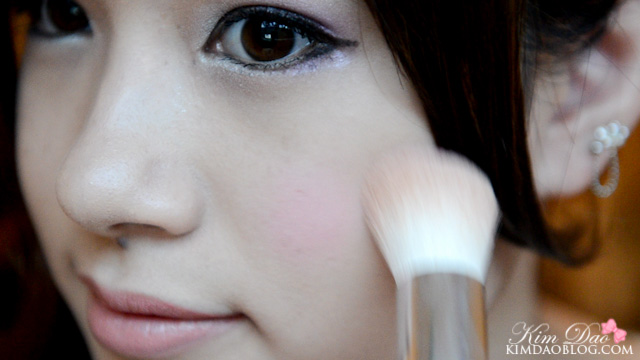
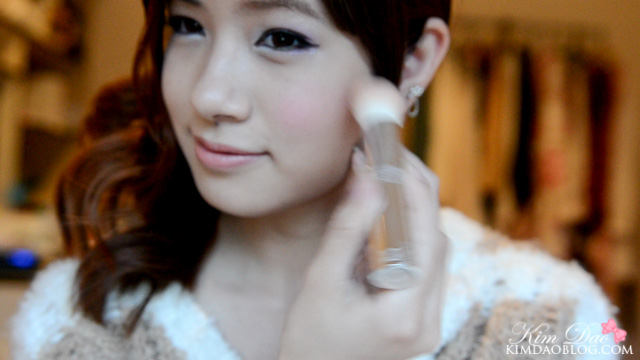
Caution: Since this blush is really pigmented, be careful not to apply too much blush on. I find just doing 1-2 gentle swipes on the 3 pink colours is enough for 1 cheek.


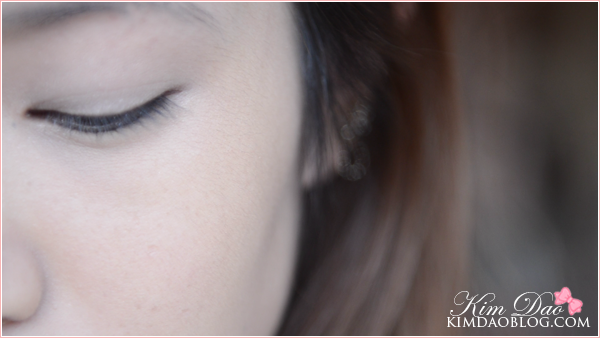
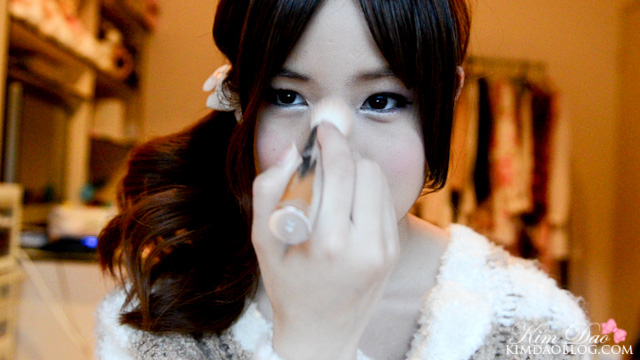
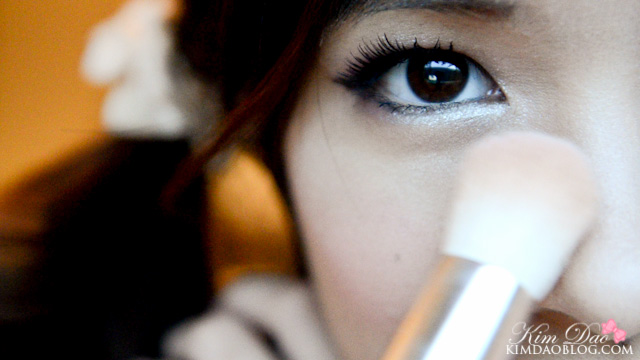
Now we're going to highlight our nose and other areas to brighten up our face


I'm going to be using the white colour on this palette. These blushes comes with many different colours, not all the palettes have white but you can use the lightest colour on your palette for this.


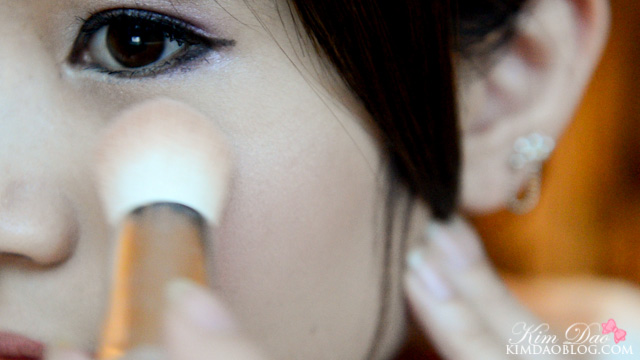
Highlighting the bridge of my nose


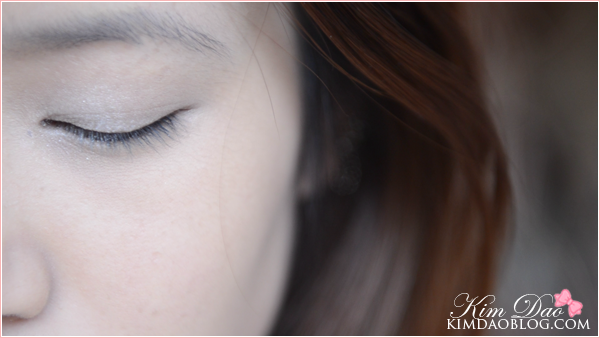
And just the area underneath my eye above my cheeks


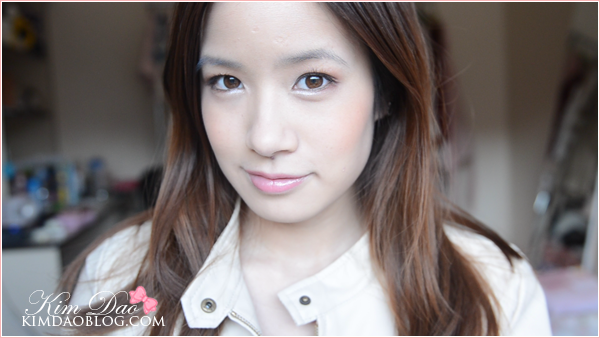
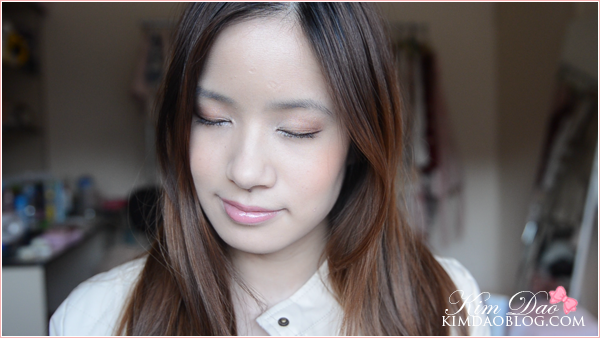
Now your makeup is complete!


As you can see, the pigmentation is great. It gives you a nice rosey glow, but also it's not over powering. Be careful not to apply too much as the colour is buildable and you do end up looking like a clown. It also lasts all day so I definitely recommend it!

You can purchase this item in most Asian countries in department stores. You can also purchase them online at sites such as Sasa, Ichibankao or Imomoko. If you decide to purchase it from Imomoko you can get 10% off your order if you put in the code "KIMDAO" at the checkout :)

Other than that, if you guys have requests on what makeup product you want me to review next, please let me know!


You can purchase this amazing blush here: